React applications handling state at component level are fine but sooner than later complexity will grow and having to pass props all the way around the app will become tedious, here is when having a centralized store for managing the application state globally comes into handy as it let us manage the data and logic from any component at any point in time.
WordPress provides the @wordpress/data package which allow us to create our own stores, in this tutorial I’m going to show how to convert an application that manages data at component level into one that consumes the data from a custom store.
Application Overview
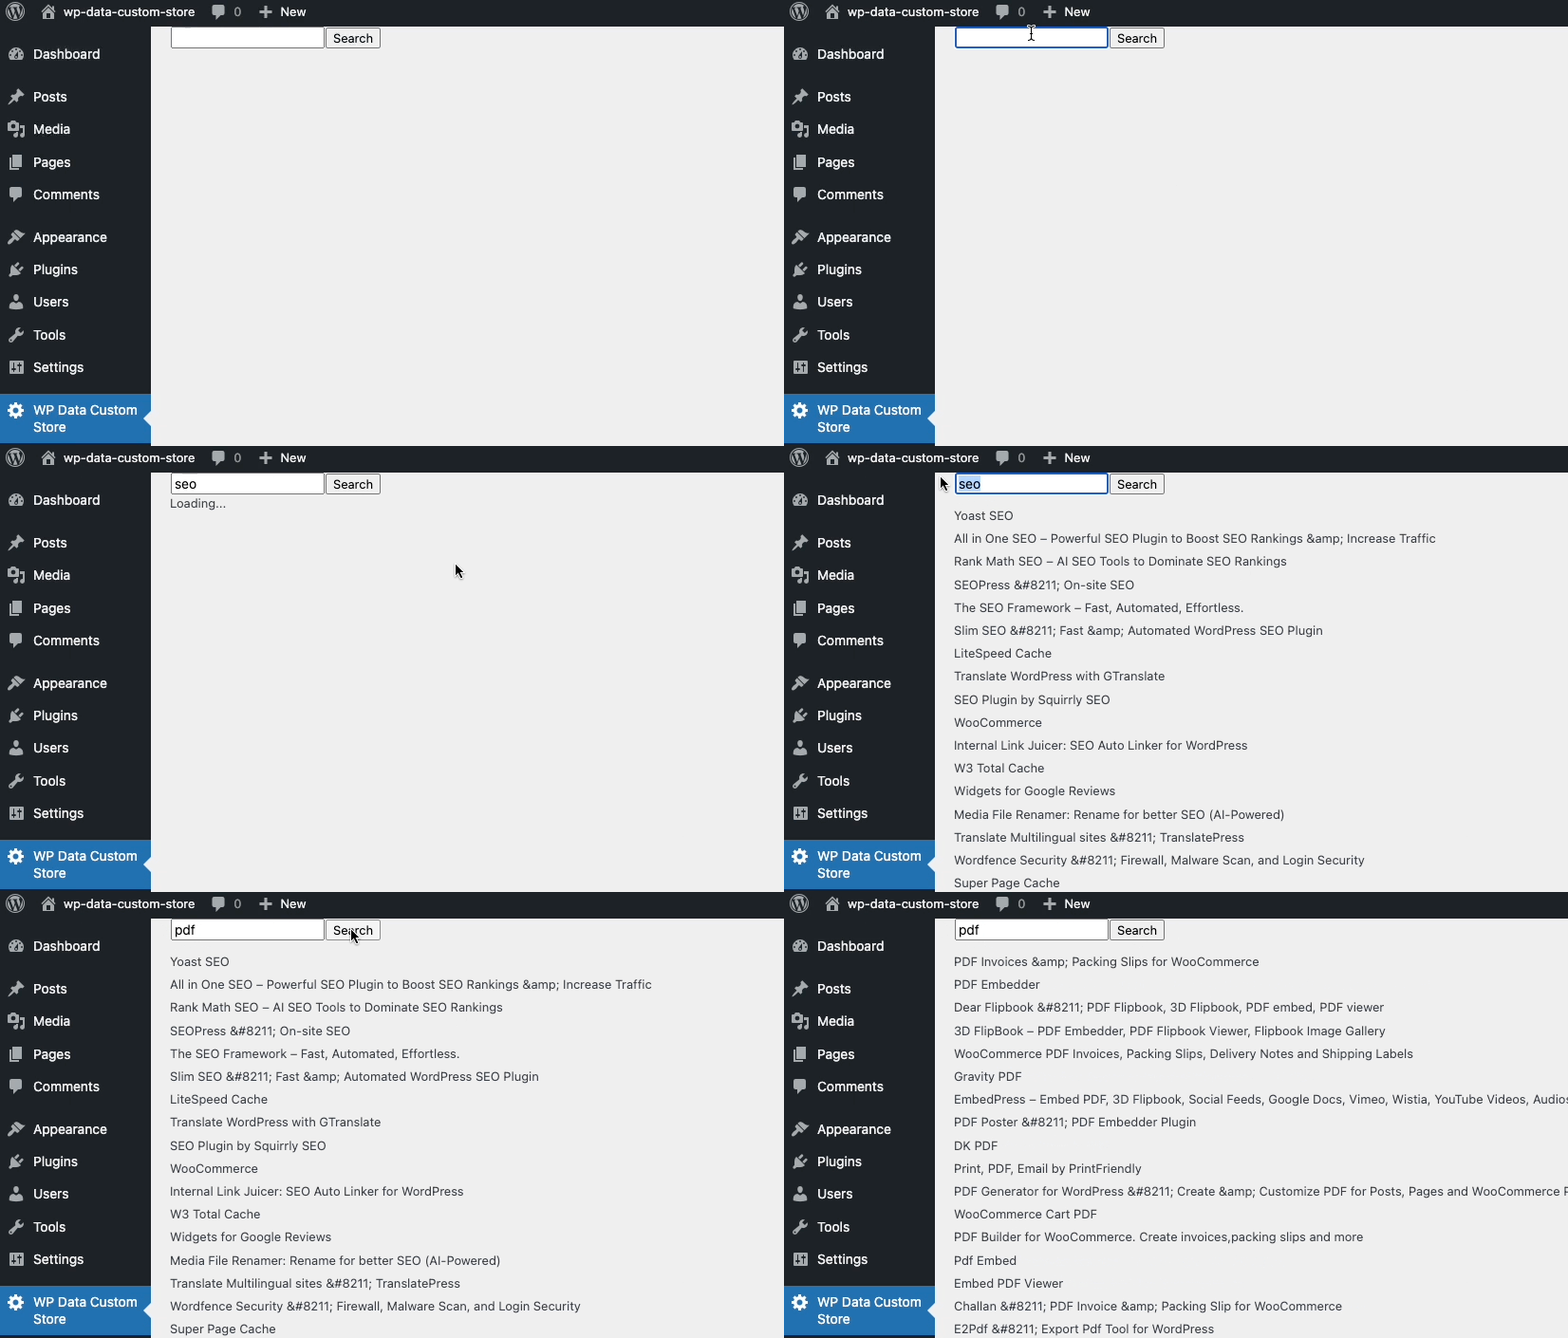
We are going to create an application that searches plugins by term from the WordPress.org API:

The initial code handles the state locally inside the App component using useState:
import {useState} from '@wordpress/element';

export function App() {
    const [term, setTerm] = useState('')
    const [plugins, setPlugins] = useState([])
    const [isLoading, setIsLoading] = useState(false)

    const onSubmit = (e) => {
        e.preventDefault()
        setIsLoading(true)

        fetch(`https://api.wordpress.org/plugins/info/1.2/?action=query_plugins&search=${term}`)
            .then(response => response.json())
            .then(json => {
                setIsLoading(false)
                return setPlugins(json.plugins)
            })
    }

    return <>
        <form onSubmit={onSubmit}>
            <input value={term} onChange={(e) => setTerm(e.target.value)}/>
            <button>Search</button>
        </form>
        {isLoading && <div>Loading...</div>}
        <ul>
            {plugins.map((plugin) => {
                return <li key={plugin.slug}>{plugin.name}</li>
            })}
        </ul>
    </>
}
Creating the Store
The first thing to do is create and register the store using createReduxStore. Create a new store.js file with the following content:
export const store = createReduxStore('plugins', {
    reducer(state = {plugins: []}) {
        return state;
    },
    selectors: {
        getPlugins(state) {
            return state.plugins
        }
    },
});

register(store);
At a minimum we need to include a reducer and a selector, please check documentation for each Redux Store Option. Also notice how we are setting the reducer state parameter with a default value, in this case plugins with an empty array.
Let see how we can get plugins data from the store into our components, to do so first add some dummy data as default value for state:
reducer(state = {plugins: [{"name":"Foo"}, {"name":"Bar"}]}, action) {
Now from any component we can get the above data like so:
import './store'
import {useSelect} from "@wordpress/data";

const plugins = useSelect((select) => {
	return select('plugins').getPlugins();
}, []);

return <>
    {plugins && plugins.map((plugin) => {
        return <div key={plugin.name}>{plugin.name}</div>
    })}
	</>
Fetching data from the API
We need to fetch data from the external API asynchronously, to do so we are going to use actions and controls .
First of all create an action for fetching the data by term and add it to the store:
const actions = {
    fetch(term) {
        return {
            type: 'FETCH',
            term,
        };
    },
}

export const store = createReduxStore('plugins', {
    actions
});
Then create a controls inside the store including our fetch action type:
export const store = createReduxStore('plugins', {
    controls: {
        FETCH(action) {
            return fetch(`https://api.wordpress.org/plugins/info/1.2/?action=query_plugins&search=${action.term}`)
                .then(response => response.json())
                .then(json => {
                    return json.plugins
                })
        },
    },
});
Now that we have our controls configured it’s time to create the action for setting the plugins value from the API response into the store, to do create a new function setPlugins into actions:
const actions = {
    setPlugins(plugins) {
        return {
            type: 'set_plugins',
            plugins,
        }
    }
}
Finally let’s add set_plugins action type into the reducer:
    reducer(state = {plugins: [], isLoading: false}, action) {
        switch (action.type) {
            case 'set_plugins':
                return {...state, plugins: action.plugins}
        }

        return state;
    },
Putting it all together
At this point we have all the pieces so the last thing to do is create a generator function inside our actions that will handle the flow fetching from the API and update the state from the response:
const actions = {
    * searchPlugins(term) {
        const plugins = yield actions.fetch(term)

        yield actions.setPlugins(plugins);
    }
}
Now from our components we can dispatch the above function which once triggered will start the flow and update the components accordingly.
Here is the final code consuming the store:
import {useState} from '@wordpress/element';
import './store'
import {useDispatch, useSelect} from "@wordpress/data";

export function App() {
    const [term, setTerm] = useState('')

    const isLoading = useSelect((select) => {
        return select('plugins').getIsLoading()
    }, []);

    const plugins = useSelect((select) => {
        return select('plugins').getPlugins();
    }, []);

    const {searchPlugins} = useDispatch('plugins');

    const onSubmit = (e) => {
        e.preventDefault()

        searchPlugins(term)
    }

    return <>
        <form onSubmit={onSubmit}>
            <input value={term} onChange={(e) => setTerm(e.target.value)}/>
            <button>Search</button>
        </form>
        {isLoading && <div>Loading...</div>}
        <ul>
            {plugins.map((plugin) => {
                return <li key={plugin.slug}>{plugin.name}</li>
            })}
        </ul>
    </>
}
That’s all, at this point we have completed the steps for creating and consuming our own custom data store. Here you have the GitHub repo with all the code.


